Metal Detector Sensitivity Settings Explained

Written by Piotr Lesniewski
Detectorist • Scotland
As an Amazon Associate we earn commission from qualifying purchases. Read our full Affiliate Disclosure.
You’re likely familiar with the frustration of constant false signals or missing valuable targets with your metal detector. Finding the perfect sensitivity setting feels like unlocking a secret code—too high and you’ll chase phantom beeps, too low and that gold ring stays hidden forever.
Mastering this single control can dramatically transform your finds, separating successful detectorists from those who go home empty-handed.
Ready to discover what you’ve been missing?
Key Takeaways
- The optimal sensitivity setting balances maximum detection depth with signal clarity and stability.
- The optimal sensitivity setting balances maximum detection depth with signal clarity and stability.
- Start with factory presets (70-80% of maximum) and adjust based on soil conditions and interference levels.
- Gradually increase sensitivity in testing until you hear excessive noise, then dial back slightly for stable performance.
- Environmental factors like soil mineralization and electrical interference often require lowering sensitivity for reliable detection.

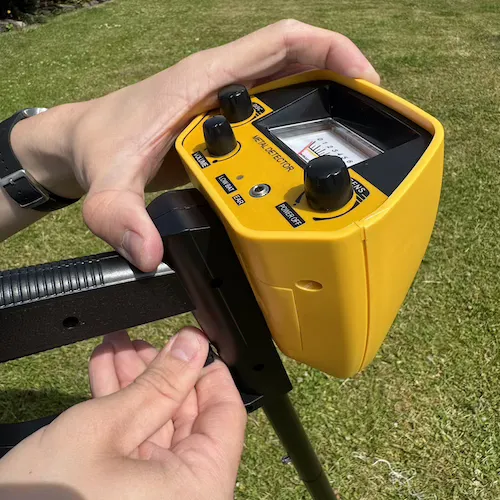
What is Metal Detector Sensitivity / Gain?
When you adjust the sensitivity or gain setting on your metal detector, you’re essentially controlling how “receptive” your device is to metallic objects in the ground. This critical control determines how intensely your detector listens for signals from buried items.
Think of sensitivity as your detector’s “hearing ability.” It manages how much amplification is applied to the weak electromagnetic signals that bounce back from targets beneath the surface.
The higher you set the sensitivity, the more your detector amplifies these faint signals, potentially allowing you to discover deeper or smaller objects. In technical discussions, you’ll often hear “gain” used interchangeably with sensitivity – both terms refer to the same function.
High VS Low Sensitivity
The choice between high and low sensitivity settings creates a fundamental tradeoff in metal detecting performance.
When you opt for high sensitivity, your detector listens more intently, detecting smaller and deeper targets while picking up weaker signals. This can significantly increase your chances of finding valuable items that might otherwise be missed.
Conversely, low sensitivity means your detector isn’t listening as carefully. While this reduces your ability to find very small or deep objects, it offers a distinct advantage: stability. Your detector becomes less susceptible to interference from mineralized soil, electromagnetic fields, or nearby electrical sources. You’ll experience fewer false signals and a cleaner hunting experience.
The ideal setting depends on your specific hunting conditions and goals—balancing maximum depth detection against signal clarity and reliability.
Why is Metal Sensitivity Important?
The sensitivity setting on your metal detector directly impacts your detection depth and ability to find small targets in the ground. You’ll need to experiment with sensitivity levels since environmental factors like mineralization, electrical interference, and ground conditions affect performance differently in each location.
Regularly adjusting your sensitivity based on your current search environment—rather than using a single setting for all hunts—will maximize your finds while minimizing false signals.
Detection Depth
Many detectorists focus on sensitivity settings because they directly impact detection depth. When you maximize your detector’s stable sensitivity, you’re essentially extending its ability to locate targets buried deeper in the soil.
This is why experienced hunters spend considerable time finding the perfect sensitivity balance. Running your detector at higher sensitivity levels sends a stronger signal into the ground, allowing it to reach targets that would otherwise remain hidden.
However, the key word here is “stable” – pushing sensitivity too high introduces noise and false signals that make detecting impossible. The ideal setting is the highest level that maintains clean operation without excessive chatter.
Small Target Detection
While detection depth offers one measure of a detector’s capability, small target detection represents another vital dimension of performance. You’ll need high sensitivity settings when hunting for items that provide minimal metal mass for your detector to respond to.
When you’re searching historical sites, many valuable finds aren’t large coins or objects but tiny fragments that tell important stories. Cut hammered coins, miniature artifacts, and delicate historical items can easily be missed with improper sensitivity settings.
Adjusting sensitivity isn’t a “set it and forget it” affair
Although many metal detecting beginners make the mistake of setting their detector’s sensitivity once and leaving it alone, proper metal detecting requires you to actively adapt your settings as conditions change. Your detector’s performance will vary significantly based on soil mineralization, electrical interference, and target depth.
Most detectors come with factory presets around 70-80% of maximum sensitivity, which serves as a reliable starting point. But don’t stop there—regularly reassess your settings as you move between locations or when conditions change.
The “Threshold of Stability” Method (The Ideal Approach)
To find your detector’s ideal sensitivity setting, first locate a “clean” area and properly ground balance your machine. With your coil at normal search height, slowly increase the sensitivity setting until you hear false signals or erratic behavior.
This point just before instability represents your detector’s optimal sensitivity level for the current conditions.
1. Find a “clean” patch of ground
Before setting your metal detector’s sensitivity, you’ll need to find a clean patch of ground for testing. This means locating an area that you’re confident contains minimal metal objects that could interfere with your calibration process.
The ideal testing spot should represent the actual ground conditions where you plan to search. Take time to scan the area briefly at a lower sensitivity first to confirm it’s relatively “clean” of targets.
2. Ground balance your Metal detector
Ground balancing serves as the foundation for optimal performance. To properly ground balance, first find a spot free of metal objects. Turn your detector on and set it to all-metal mode. Hold the coil about 6-8 inches above the ground, then slowly lower and raise it several times.
Adjust the ground balance setting until you hear minimal sound variation between the raised and lowered positions. You’ll know you’ve achieved proper balance when the threshold tone remains consistent regardless of coil height.
3. Hold the coil still at your normal search height
Once you’ve properly ground balanced, hold the coil completely still at your normal search height—typically 1-2 inches above the ground. Keep the detector motionless as you prepare for the sensitivity adjustment. This stationary position establishes your baseline for finding the threshold of stability.
4. Gradually increase the sensitivity
Start with your sensitivity at its lowest setting, then incrementally turn it up while keeping the coil motionless. As you advance the dial, pay close attention to the audio feedback. You’ll eventually reach a point where faint crackles, pops, or an unstable hum become noticeable. This threshold marks the boundary between stable operation and excessive sensitivity.
5. Identify the point of instability
As you gradually increase sensitivity, you’ll reach a critical point where the machine becomes unstable.
You’ll recognize this threshold when your detector starts producing excessive noise or false signals—even when you’re not sweeping over any targets.
These erratic sounds occur simply from ground or electromagnetic interference (EMI). Your detector has become “too chatty.” Once you identify this point of instability, dial the sensitivity back just slightly.
6. Back it off slightly
After identifying the instability point, you’ll need to back off the sensitivity by one or two notches. This slight reduction creates the optimal balance between maximum detection depth and reliable operation. You’re looking for that sweet spot where the detector becomes quiet and stable again without sacrificing too much detection power.
7. Test with sweeping
Once you’ve adjusted your sensitivity, it’s time to perform a dynamic test by sweeping the coil over the ground in your actual search pattern. A properly adjusted detector will maintain stability throughout the sweep. If it becomes chattery or erratic when in motion, you’ll need to decrease sensitivity slightly more or recheck your ground balance.
When to DECREASE Metal Detector Sensitivity
You’ll need to decrease sensitivity when certain conditions impair its normal functioning. Common situations include highly mineralized soil, electrical interference, a “chattery” detector, trash-filled locations, and wet salt sand beaches.
High Ground Mineralization
When highly mineralized ground interferes with your detecting, decreasing sensitivity is essential. This issue is particularly common in areas with iron-rich soils, volcanic regions, and locations with “hot rocks.” Lowering your sensitivity allows your detector to ignore some of the ground’s mineral signals while still finding actual targets.
Electromagnetic Interference (EMI)
Electromagnetic interference (EMI) can wreak havoc on your detector’s performance, causing erratic behavior. This interference typically comes from power lines, electric fences, and other electronic equipment. When you notice your detector acting unpredictably near these sources, your first action should be to reduce sensitivity.
“Chattery” Detector
When your metal detector becomes overly talkative with constant beeping, popping, or falsing, you’re likely running sensitivity too high for current conditions. This chattiness makes it hard to differentiate between real targets and false alerts. Rather than powering through, simply dial back your sensitivity.
Extremely Trashy Sites
Hunting in areas covered with metallic trash presents a unique challenge. When your detector is constantly screaming from multiple trash signals, it's difficult to identify legitimate targets. Slightly reducing sensitivity in these situations can improve your ability to pick out individual signals.
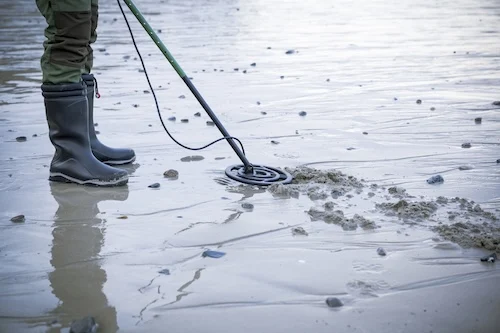
Wet Salt Sand (especially with single-frequency VLF detectors)
Wet salt sand is a challenging environment, particularly for a single-frequency VLF detector. The high conductivity of salt water creates excessive noise. You’ll need to decrease your sensitivity settings to compensate. If you’re serious about beach metal detecting, consider using a detector with a dedicated beach mode or investing in a pulse induction machine.
Working very close to another detectorist
When you’re detecting in close proximity to another person with a metal detector, your machines can interfere with each other. If you notice your detector acting unusually, either lower your sensitivity setting slightly or change your operating frequency if your detector allows for this option.
When you MIGHT be able to INCREASE Sensitivity
You’ll find opportunities to increase sensitivity in areas with low mineralization, minimal EMI, or when searching for very small or deep targets.
Low Mineralization Ground
When hunting in locations with sandy soil, certain woodlands, or well-maintained parkland, you’ll typically encounter less ground interference. These low mineralization conditions create the perfect opportunity to crank up your sensitivity for increased detection depth.
Areas with Little to No EMI
In remote countryside areas, far from electrical interference, your detector’s sensitivity can be significantly boosted. Without power lines or cell towers creating false signals, your detector can operate at peak performance levels, meaning deeper detection and improved target separation.
Searching for Very Small or Deep Targets
Hunting for extremely small or deeply buried treasures sometimes justifies pushing sensitivity to its upper limits. As an advanced technique, you’ll need to accept some trade-offs. Your detector will become more unstable, but the potential reward is detecting targets that would otherwise remain hidden.
Relationship with Other Metal Detector Settings
Your sensitivity setting doesn’t exist in isolation; it works with other critical functions like ground balance and discrimination.
Ground Balance
The relationship between sensitivity and ground balance is critical. When your ground balance is incorrectly set, your detector responds more strongly to mineralization, creating false signals. This forces you to reduce sensitivity, sacrificing depth. Always ground balance your detector before adjusting sensitivity.
Discrimination
Discrimination lets you filter out unwanted targets. Be careful about running high sensitivity alongside high discrimination in trashy areas. This combination can create “ghosting” or unclear signals. Consider lowering your sensitivity when using high discrimination in cluttered locations for a balanced approach.
Tips for Mastering Metal Detector Sensitivity
Mastering sensitivity requires careful attention to audio cues, adjusting to conditions, and understanding your specific model.
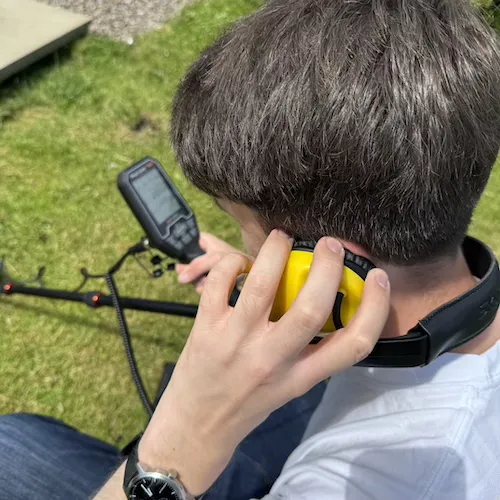
Listen Carefully
Your ears are your most powerful detection tool. Learn to differentiate between a clean, repeatable target signal and the random pops and crackles that indicate instability or interference.
Don’t skimp on quality headphones; they are essential for isolating subtle signals.
Don’t Assume Higher is Always Better
This common misconception often leads to frustration. A stable detector at slightly lower sensitivity will typically outperform an unstable one pushed to its limits because you’ll receive clearer, more consistent signals.
Think of sensitivity like a conversation volume. Too quiet and you’ll miss important details, but too loud and everything becomes distorted noise.
Find that sweet spot where your detector communicates reliably.
Adjust to Conditions
Your detector’s optimal sensitivity will fluctuate as soil conditions, mineralization, and interference change. Develop the habit of making small adjustments as you move between locations. Listen to your machine’s feedback—excessive chatter indicates it’s time to recalibrate.
Read Your Manual
The foundation of proper sensitivity adjustment begins with your detector’s instruction manual. It contains manufacturer-recommended starting points and troubleshooting tips for your specific model. Don’t overlook these model-specific nuances.
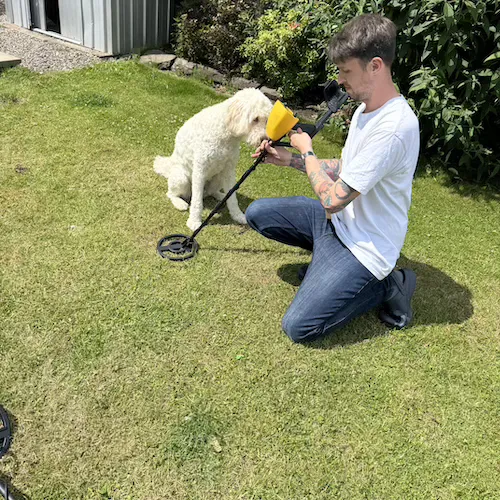
Practice
Consistent field practice will help you develop an intuitive feel for your detector’s sensitivity sweet spot. Test your detector in your yard and take it to different locations with varying soil conditions. Keep a journal of your findings and which settings worked best.
Conclusion
Finding your detector’s ideal sensitivity means striking the perfect balance between depth and stability. You’ll need to adjust based on your specific conditions, whether it’s mineralized soil or urban interference. Remember, there’s no one-size-fits-all setting. As you’ve learned, sensitivity works with other settings to create optimal performance. Keep practicing the threshold method, and you’ll soon be maximizing your finds in any environment.
Author Profile
Piotr Lesniewski
"Digging up the past, one signal at a time."
Polish-born, Scotland-based, and obsessed with the beep. My passion began decades ago, exploring fields with my Dziadek (grandfather). Now, with over 10 years of digging under my belt, I'm here to share everything I've learned—unfiltered and unbiased—to help you unearth your own piece of history. No sales pitches, just real field experience.